You can only enter a referral code once. This action cannot be undone.
en

Guide
/
Detail
INSTRUCTIONS FOR USE OF HYPERLIQUID
Published 07/11/2025 03:34:13
Table of Contents
- Introduction
- Connect Wallet
- How to Get API Key
- How to Deposit to HyperLiquid
I. Introduction
HyperLiquid is a decentralized exchange (DEX) specialized in derivatives trading, operating on its own Layer 1 blockchain. The platform supports Perpetual Futures and Spot Trading with a user experience similar to centralized exchanges (CEX).
II. Connect Wallet to HyperLiquid
Supported Wallets
HyperLiquid supports the following wallets:
MetaMaskTrust WalletCoinbase WalletOKX WalletWalletConnect (other wallets)Email (direct registration)
Wallet Connection Steps
Step 1: Visit https://hyperliquid.xyz
Step 2: Click the "Launch App" button on the homepage

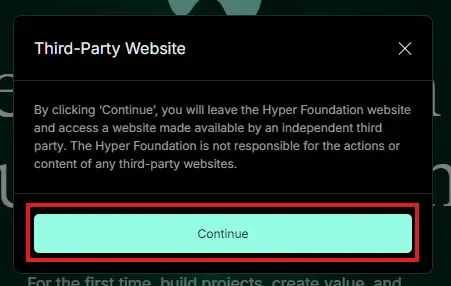
Step 3: Click "Continue" to enter the trading interface
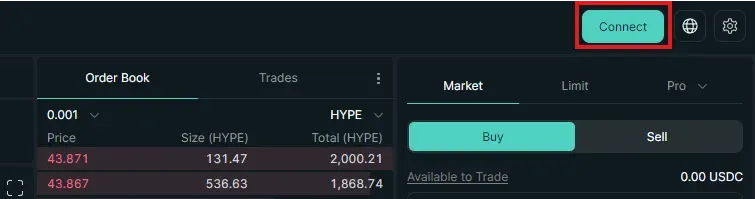
Step 4: Find and click the "Connect" button at the top-right corner of the screen
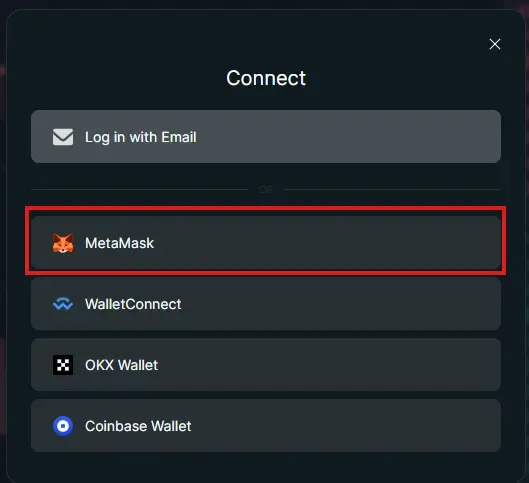
Step 5: Select the wallet you want to connect from the list
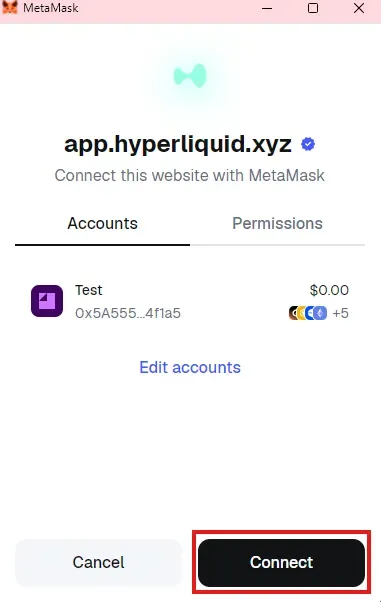
Step 6: Click "Connect" in the wallet pop-up window
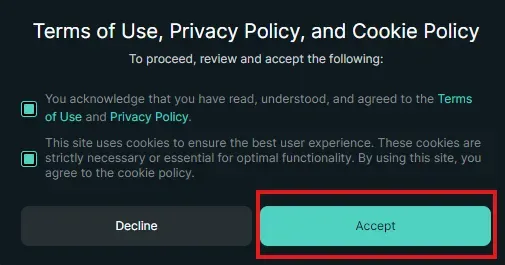
Step 7: Read the Terms of Service carefully
Step 8: Click "Accept" to agree to the terms
Step 9: Click "Confirm" in your wallet to complete the connection signature
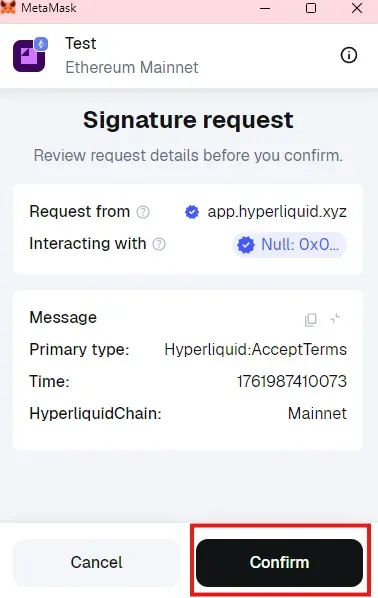
Step 10: Your wallet is now successfully connected to HyperLiquid
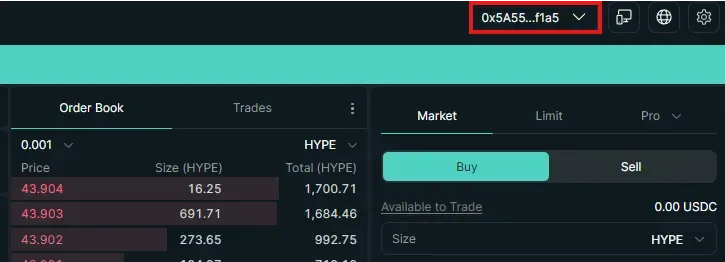
Once connected, your wallet address will appear at the top-right corner of the screen.
II. HOW TO GET API KEY
Requirements Before Creating an API Key
Important: You MUST have funds in your HyperLiquid account before you can create an API Key. If your balance is zero, the API Key creation feature will be unavailable.
Prerequisites:
- Wallet successfully connected
- Account funded
- Trading feature enabled (Enable Trading)
Steps to Create API Key
Step 1: Connect your wallet to HyperLiquid (https://app.hyperliquid.xyz)
Step 2: Click the "More" button on the top navigation bar
Step 3: Select "API" from the dropdown menu
Step 4: Name your API Key (e.g., "Trading Bot", "Python Script", etc.)
Step 5: Click "Generate" to start creating the key
Step 6: Save your Agent Wallet Address
- This is your API wallet address
- Copy and store it securely
Step 7: Click "Generate API Wallet" to continue
Step 8: Choose the validity period for the API Key
- You can select from a few days up to 180 days
- Recommended: select "MAX" (180 days) for convenience
Step 9: Copy and store your Private Key
- EXTREMELY IMPORTANT: This is your secret key
- The Private Key is displayed ONLY ONCE
- Store it securely, do not share it with anyone
- If lost, it cannot be recovered
Step 10: Click "Authorize" and sign the transaction in your wallet
Security Notes
- The API Key will automatically expire after the selected period (up to 180 days)
- After expiration, a new API Key must be created
- If you suspect your Private Key has been compromised, revoke access immediately
III. HOW TO DEPOSIT TO HYPERLIQUID
Preparation Before Depositing
Accepted Assets:
HyperLiquid accepts USDC as the main trading asset. You can also deposit other tokens like ETH, BTC, SOL, but they will be automatically converted to USDC (takes more time).
Supported Blockchains:
- **
Arbitrum** (recommended - lowest gas fees) - Ethereum Mainnet (higher gas fees)
What You Need:
- USDC in your MetaMask/Trust Wallet
- USDC should be on the Arbitrum network for cheaper fees
- Some ETH on Arbitrum for gas fees (around $5–10 is enough)
How to Move USDC to Arbitrum (if needed)
If you don’t have USDC on Arbitrum, there are 2 ways:
Method 1: Withdraw from a CEX
- Withdraw USDC from Binance/OKX/Bybit
- Select the Arbitrum One network when withdrawing
- Enter your MetaMask wallet address
Method 2: Bridge from Another Network
- Use bridge services like RocketX, Across, Hop Protocol
- Transfer USDC from Ethereum/Polygon/BSC to Arbitrum
- Usually takes 5–20 minutes
Steps to Deposit to HyperLiquid
Step A: Enable Trading (only needed once)
Step 1: After connecting your wallet, find the "Enable Trading" button at the bottom-right corner
Step 2: Click "Enable Trading"
Step 3: A pop-up window appears, click "Establish Connection"
Step 4: MetaMask will ask you to sign — click "Confirm"
Step 5: Wait a few seconds for confirmation
Once completed, you won’t need to repeat this step again.
Step B: Deposit USDC to Your Account
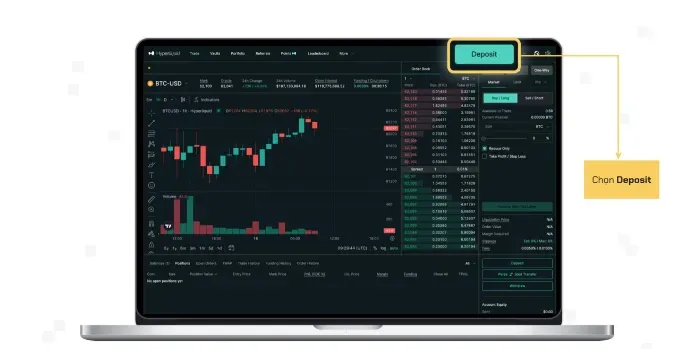
Step 1: Click the "Deposit" button at the top-right corner
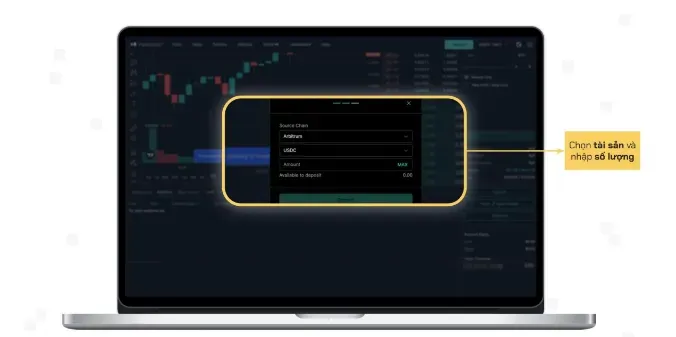
Step 2: Choose Source Chain
- Select "Arbitrum" (recommended)
- Or other networks if you have USDC there
Step 3: Select the Token you want to deposit
- Choose "USDC" (fastest option, no conversion needed)
- You can also choose USDC.e or USDT (they will automatically convert to USDC)
Step 4: Enter the amount of USDC to deposit
- Example: 100 USDC
- Note: Leave a small amount of ETH in your wallet to pay for gas fees
Step 5: If MetaMask is on a different network
- A "Switch Network" button will appear
- Click it to switch to Arbitrum
Step 6: Click the "Deposit" button
Step 7: MetaMask will show a transaction confirmation
- Double-check the amount and gas fee
- Gas fees on Arbitrum are usually only about $0.04 - $0.20
- Click "Confirm" in MetaMask
Step 8: Wait for the transaction to be confirmed
- Usually takes around 10-30 seconds
- USDC will automatically appear in your HyperLiquid account
Step 9: Check your balance
- Your USDC balance will appear at the top-right corner
- By default it is deposited into your Perps account (for Futures trading)
Transferring funds between Spot and Perps accounts
HyperLiquid has two types of accounts:
- Perps Account: Used for Perpetual Futures trading (with leverage)
- Spot Account: Used for Spot trading (direct buy/sell)
How to transfer:
- Click your balance in the top-right corner
- Select "Transfer"
- Choose the direction (Perps → Spot or Spot → Perps)
- Enter the amount to transfer
- Click "Confirm"
Transfers are instant and completely free.
IV. Withdraw funds from HyperLiquid
If you want to withdraw funds back to your wallet:
Step 1: Click "Withdraw" (next to the Deposit button)
Step 2: Select the Destination Chain
- Choose Arbitrum to minimize fees
Step 3: Enter the amount to withdraw
Step 4: Click "Withdraw" and confirm the transaction
Step 5: Wait 1-2 minutes — the USDC will arrive in your MetaMask wallet
Important Notes
- Gas Fees: Each deposit/withdrawal costs a small Arbitrum gas fee (just a few cents)
- Trading on HyperLiquid: Completely gas-free after depositing
- Processing Time: Deposits usually take 10–30 seconds
- Minimum Amount: No minimum limit, but it’s recommended to deposit at least $10
- Security: Always verify the official URL — https://hyperliquid.xyz
V. Support and Resources
- Official Website: https://hyperliquid.xyz
- Documentation: https://hyperliquid.gitbook.io
- Discord: Join the community for live support
- Twitter/X: Follow for the latest updates